Friday, August 2, 2013

Tricycle Makeover


Free but funky?
We got a free tricycle from a neighbor, but the frame was pink. Since I planned to clean it anyway, I decided it would be worth the effort to spray-paint the frame. 


Time & Effort?
Like every painting project (ever)… the prep takes the most time. Still “round trip” this project was only about 2 hours (plus about 6 hours drying time). The secret is to use Glad “Press-n-seal” wrap to mask the awkward areas (thanks Pinterest!)

Color?
I picked a helmet first, and then picked the spray paint to coordinate. I got basic glossy spray paint: Rustoleum “Gloss Protective Enamel” ($3) because it was cheap and it matched the main color on the helmet. (More about toddler helmets below).


Clean
I detached the removable basket and cleaned the plastic areas with a Mr. Clean Magic eraser. I cut mine into 2” chunks so that they last longer. This project just consumed one chunk.


Adjust 
This trike is adjustable, so I removed the bolt and positioned the frame in the largest setting. Since we will eventually need to use the bigger settings, I didn’t want a weird unpainted ring on the frame later.


Scuff
I scrubbed off some rust with a leftover (very fine) 3M sanding block. Then I scuffed up all the pink areas until they were no longer glossy. Note: this did remove the name off the frame (if you are thinking about re-sale later).
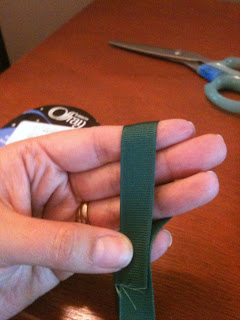


Mask
Use painters tape and Press-n-seal to cover everything but the frame.


Paint
I flipped the trike upside-down to start, and followed the directions on the can. I put on two coats of paint, although one was covering it pretty well. Then I flipped it right-side-up and did two from that angle. 


Unveil
I let the paint dry a few hours until it was no longer sticky and I couldn’t dent it with my fingernail, then I removed all the tape and plastic.Ta-da!


Adjust
I waited as long as I could to put the basket back on and adjust the size-bolt again, but it was only 6 hours dry time all-together. So it's really a same day project, I painted it during an early nap and He used it that same evening.


Toddler Helmets
I’m glad that I measured my son’s head because I would have bought the wrong size helmet. Although my son is only two, his head is 20” around (mine is a women's med/large at 21.5”). 

I bought this Schwinn one from Walmart ($17) made for ages 5+ that has an adjustable dial for fit. For us, the toddler sizes were too small since the age 3+ helmet was exactly 20” at the largest setting.


Not Sure if they Need a Helmet?
Truthfully, I was on the fence about getting a helmet, since I planned to be within arm’s reach of him (plus I survived childhood without one). The deciding factor was actually seeing him flip the trike and having to physically “catch” his head before it hit the pavement (while he was going sort of fast).

...I had assumed he couldn’t go fast enough to flip it over while peddling, but I didn’t consider the momentum from the slight grade of our driveway. Gaining speed going down the driveway, he turned the front wheel 90 degrees, and the forward momentum of his body was enough to pull the thing over. I figured I was probably lucky in catching him that once, and shouldn’t tempt fate by skipping the helmet...

Anyhow, I already got the trike for free, so the helmet seemed like a worthy purchase at less than $20, in any case it's still much cheaper than urgent care!

Here He is enjoying his "dude" bike that mommy "fixed"


Wednesday, June 26, 2013

Turn Old Jeans into a Wrapping Paper Holder


This project uses an old pair of jeans to make a wall-pocket style holder for wrapping paper. 

Finished Wrapping Paper Holder

Free + Quick & Dirty
If you have the stuff on hand it's totally free! Besides the jeans all I needed was thread and about two feet of ribbon. I skipped the normal ironing and pinning that are usually required for a professional looking outcome. This casual approach works fine because the worn denim is already going to look pretty casual.

Cut em off at the legs
Lay the jeans flat with both legs together and cut straight across the leg. Then remove the ankle hem. 

Cut the legs off the pants


Cut the hem off the legs


Hem the Thigh Ends
Turn the legs inside out, and fold the thigh side into about a 1.5 inch hem and stitch. I used my index finger joint to match the hem depth as I went around. Note: the thigh inseam did need a little fold to keep the hem straight (because the inseam is curved the fabric is a tiny bit longer there).

Hem the Thigh Side

Sew Them Shut
Lay the leg flat with the side seams almost matched up. You don't lay the seams right on top of each other so that you can avoid sewing through too many layers at once. Really any way is fine; just try to do both legs the same way. 

Sew the ankle side shut

Turn Right Side Out & Pin
Turn the legs inside-out; they should each look like a long pocket. Line up the top edges and lay one pocket slightly on top of the other with an overlap of about 1.5” and pin. I used my index finger as a reference again. Do the same at the bottom, then the middle, then add a couple more pins if needed.

The leg is now a pocket
Pin the two pockets together

Sew Pockets Together
Stitch down edge of the top pocket, sewing the pockets together. Flip over and stitch along that side too so that the overlap is stitched down with two rows of stitching.

Sew the pockets together

Add Loops
Make a loop of ribbon wide enough to go around 3 fingers plus a little extra for hem allowance. Cut three other pieces to match. Lay the project down and smooth flat and pin low on the fold if desired. Place the ribbon loop on the back side of fabric, just next to the crease and pin. Repeat with the other side.

Cut this much ribbon


Position the Ribbon on the back side

 
Stitch the top part of the ribbon along the top hem, then turn 90 degrees and stitch more until you almost reach the raw edge, turn again repeat to the edge of the ribbon, then turn once more to complete the box of stitching. For extra strength you could also stitch an “X” shape across the box, but I didn’t bother.


Trim all the loose threads and admire your project. Mine is in the garage hanging on "S" hooks, I would probably use those 3M command hooks for a closet.  (I made two sets of holders, they are sharing the same “S” hook in my picture.)

Finished Holder
Not bad for totally free and made during nap time!

Friday, June 14, 2013

How to Hem Jeans without Measuring


Use an pair that fits as a template!


Jeans stacked with longer pair on bottom
How Hems on Jeans are Different
The yellow stitching and puckered edge give the jeans their classic look. This technique moves the hem edge up the pant leg to preserve that factory look.


Line up inseams
Wash and dry the new jeans the same way that you will handle them in the future. Lay both pairs face down with the longer pair on the bottom. Line up the inseam where the legs come together at the top. The butt seam won’t lay flat because of the curve, so lift the points up together.

Line up and smooth out the legs, starting at the top working towards the ankle. The side seams do not have to be visible on top, so just line up the legs so they lay flat together.

Line up inseams and lift together

Align the Hems
Note the yellow hem stitching on the shorter pair. Roll the longer leg up in a single cuff until its yellow stitching is lined up with the shorter pair. 

Line up the yellow seams

Pin & Press
Insert pins parallel along the existing hem on the long leg following the seam very closely. Ideally use metal or glass-head pins so you can iron over them. Press the pinned area smooth for more professional results.

Ironed leg vs not ironed


Check the Length
Turn the cuff back into the leg, the extra fabric will be a ring-shaped pocket inside the leg. Repeat with the other leg and then CAREFULLY try them on and verify fit. 

Note: Sit down to try them on, because pins and jumping don’t mix!

Turn excess fabric inside leg
Excess fabric now inside


Sew Close
After you verify length, turn the excess fabric back out so that the leg is back to a single cuff again. Note: The pants should be right-side-out when you sew, not inside-out like some other pants hemming projects. 

Place the existing yellow stitching barely under the left side of the presser foot. The new stitching will be about 1/8” from the original yellow seam.

Use a straight-stitch with a matching or slightly darker thread. These jeans are dark-rinse, so I used navy colored thread. If you don’t sew often, practice on a scrap to make sure the stitching looks right before you sew on your jeans.

Original stitching 1/8 inch from new seam

Trouble shooting bad stitching: 
Check if the machine is threaded wrong, the bobbin facing the wrong way, the (thread) tension not set at medium, or the needle is too fine so that the thread doesn’t fit in the groove around the eye.


So... Why is the new seam offset?
We don’t stitch directly over the yellow seam because of the thickness of the fabric. If we stitched directly on top of the yellow thread we would not be able to see the yellow thread when the fabric was turned right side out.

This is because folding fabric isn’t like creasing a flat sheet of paper; the fabric is thicker so it’s more like a U-turn. This difference means that the new seam must be a fraction of an inch away from the old one so that the U-turn butts right up to the yellow seam without covering it.
  
Admire the Illusion

This very close stitching hides the new seam in the "ditch" of the old one. In this picture I'm pulling on the fabric apart to highlight the new stitching from the outside view of the fabric. Without tension the seam creates an optical illusion where the new stitching hides in the shadow of the original seam.

New seam visible with tension


Trim
Cut away excess fabric about ¼” of the new seam. The two side seams are very thick and hard to cut through, to make it easier; make two cuts parallel to the side seams (stopping ¼” away from the new seam). Then you may cut across the tab without risking a mistake from slipping.


Bind
Sew a zigzag stitch casting over the raw edge near to the new seam. Place the cut edge barely touching the right side of the presser foot, so that the needle clears the raw edge of the fabric on the right stroke of the zigzag stitch. Repeat with other leg. Turn the bound edge inside the leg and press the seam open while gently tugging it more flat. 

Zigzag stitch over raw edge
Admire the illusion of a factory hem! 

New shorter length
Bonus
Save the scrap to use for patches later. Buy iron applique backing from the fabric store and make them no-sew if you want.

Enjoy!